
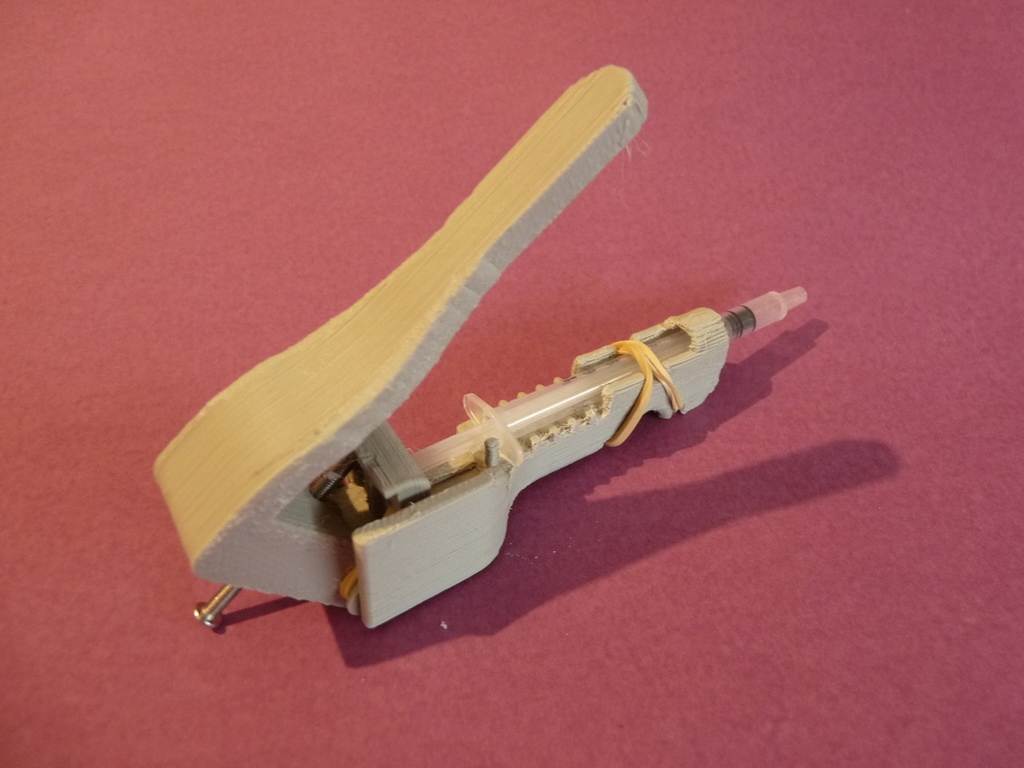
Solder Paste Dispenser for 1ml Syringe
By: James
A 3D printable dispenser tool for Solder Paste using a 1ml syringe, rubber band, an M3 screw, and a piece of tubing for filling.
This was inspired by Albert van Dalen's Spotty Precision Micro-Dot Dispenser, and the Micro Dot Dispense. My version is easier to build, needs less components, has increased throw, and can be back-filled in place.
Printing Recommendation
Print the parts in the orientation in the files
Most importantly is to print the tension puller (sliding piece) so that the rounded hole side is flat on the surface, no supports, and enable ironing on the top surface so it is as smooth as you can get it as the screw must slide up and down on this surface.
The lever should be printed on it's side as given in the files so that the layer lines carry the force.
The main body, which you should pick the one that suits your handedness, prints without support.
Assembly
You will need two M3 screws of 30mm (or longer).
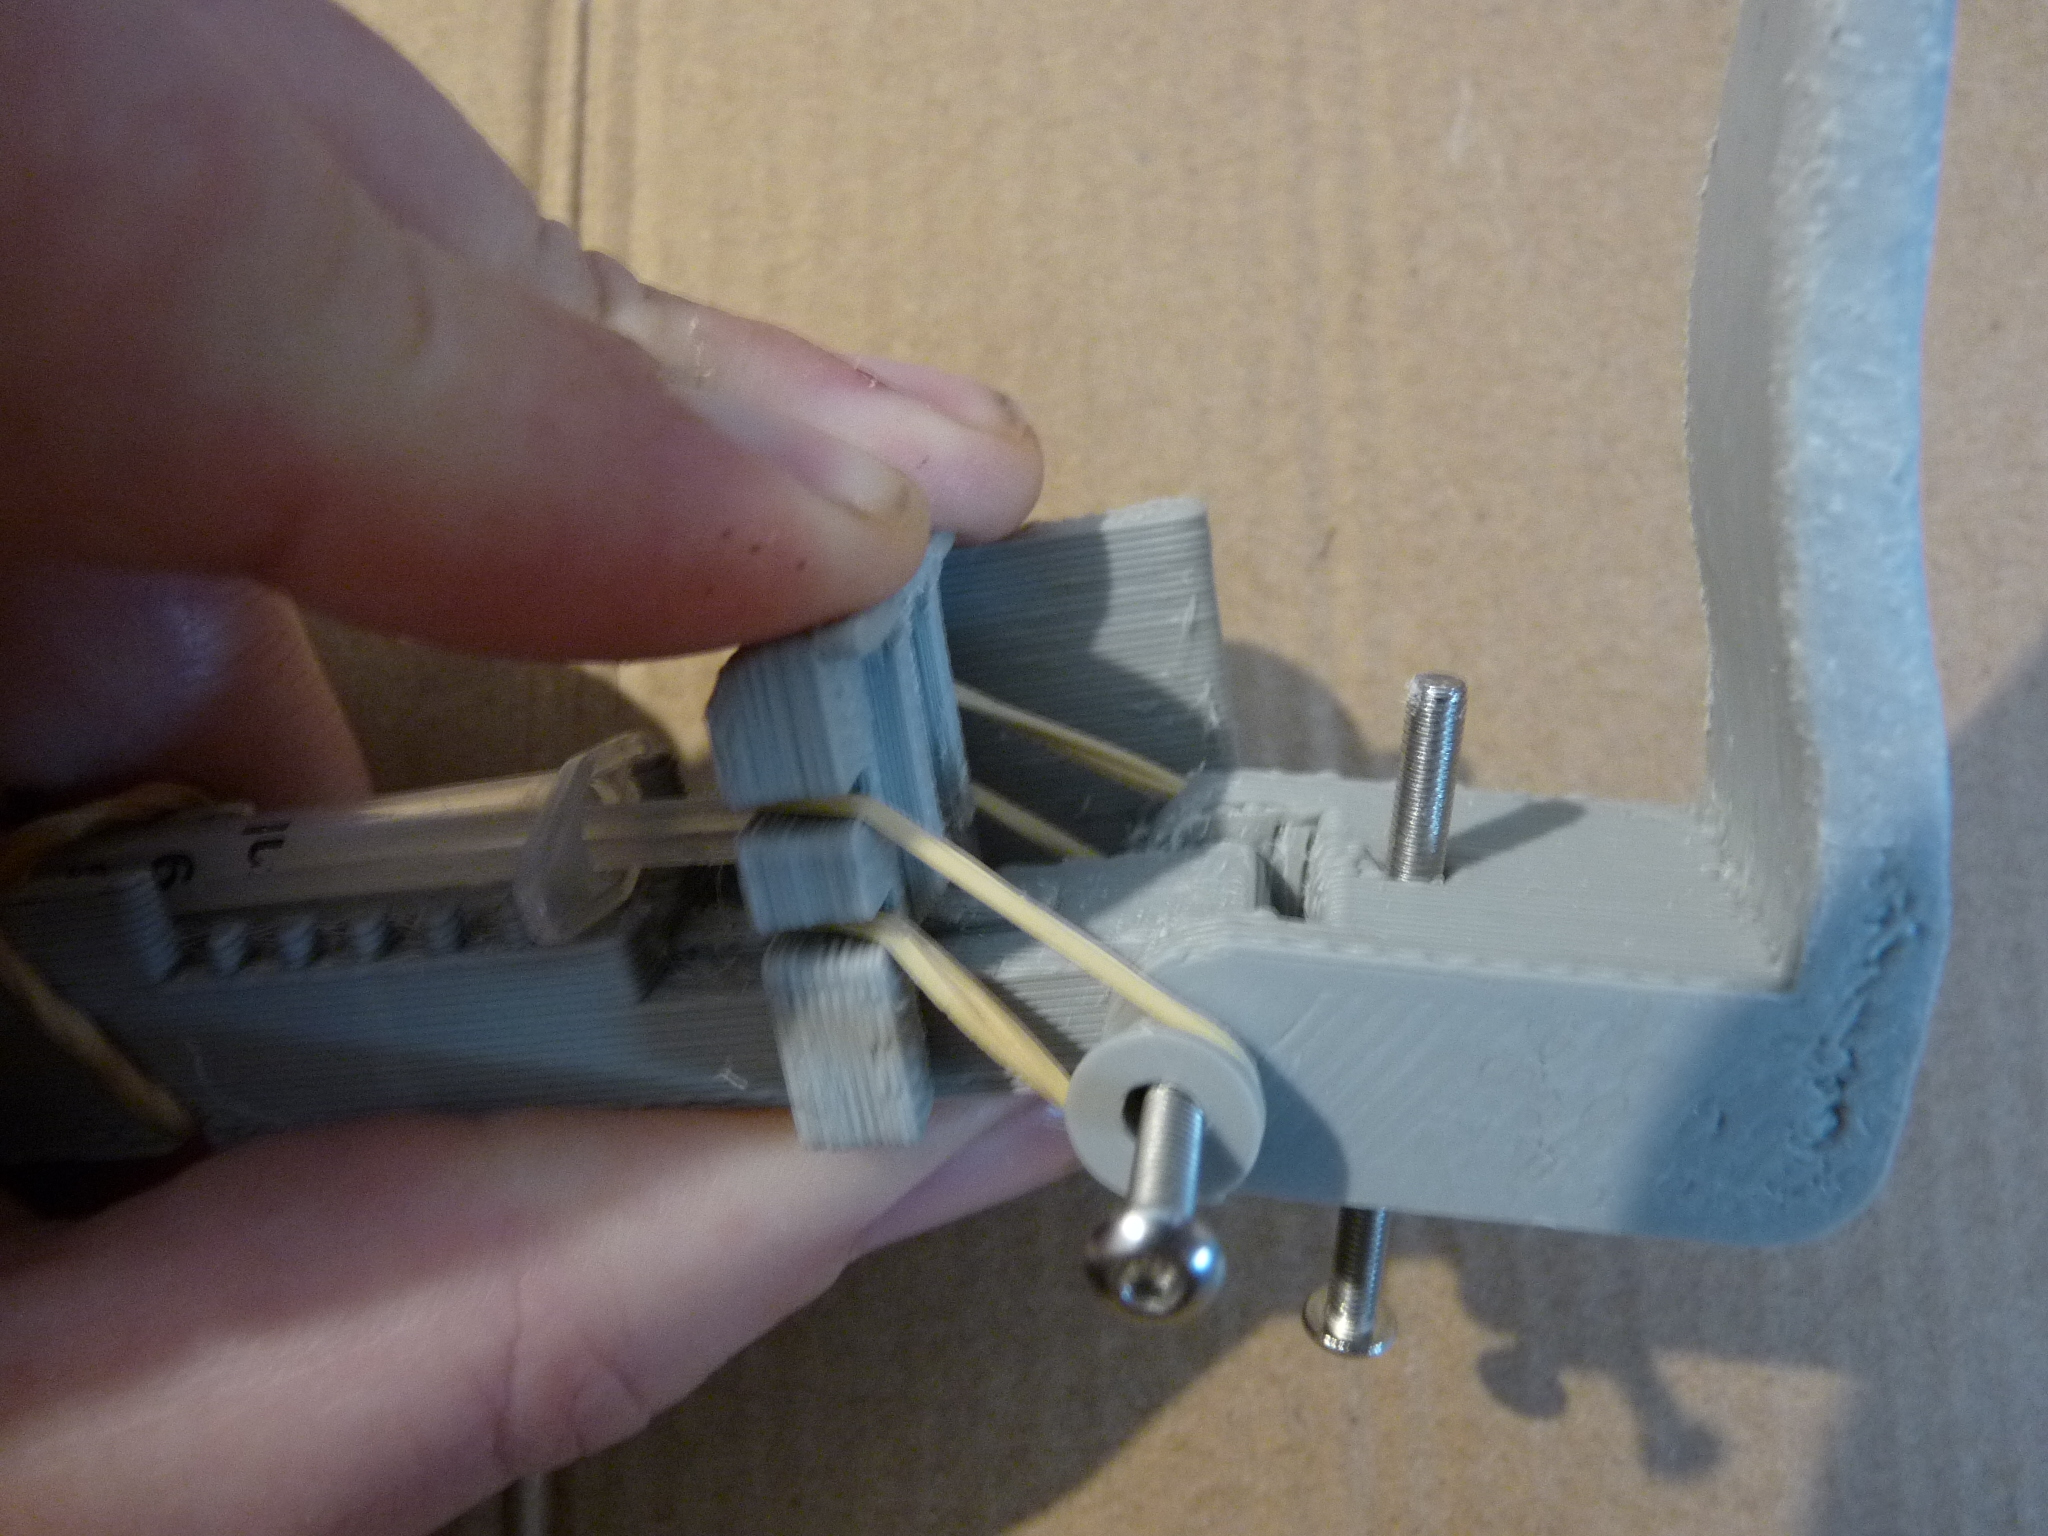
Fit the lever over the main body, and use one of the screws as the axel, having one of the anchor washers (flange outwards) on each end. The axel hole in the main body is tightly fitted so that the screw will cut it's own thread, while the lever holes are looser so they will rotarte freely. The finger guard side washer will just fit in the gap so it's simplest to screw the axel through until you see it just coming out the other side, slightly pull the guard and slip the washer which will click over the axel, then continue screwing the axel until it just touches the guard.
The second screw should screw into the back of the lever so that approximately 10mm is protruding under the lever.
If you don't have M3 screws of that length you could probably just use some 3mm dowel, once set at the correct position the lever arm screw does not need to be moved so it could be glued in.
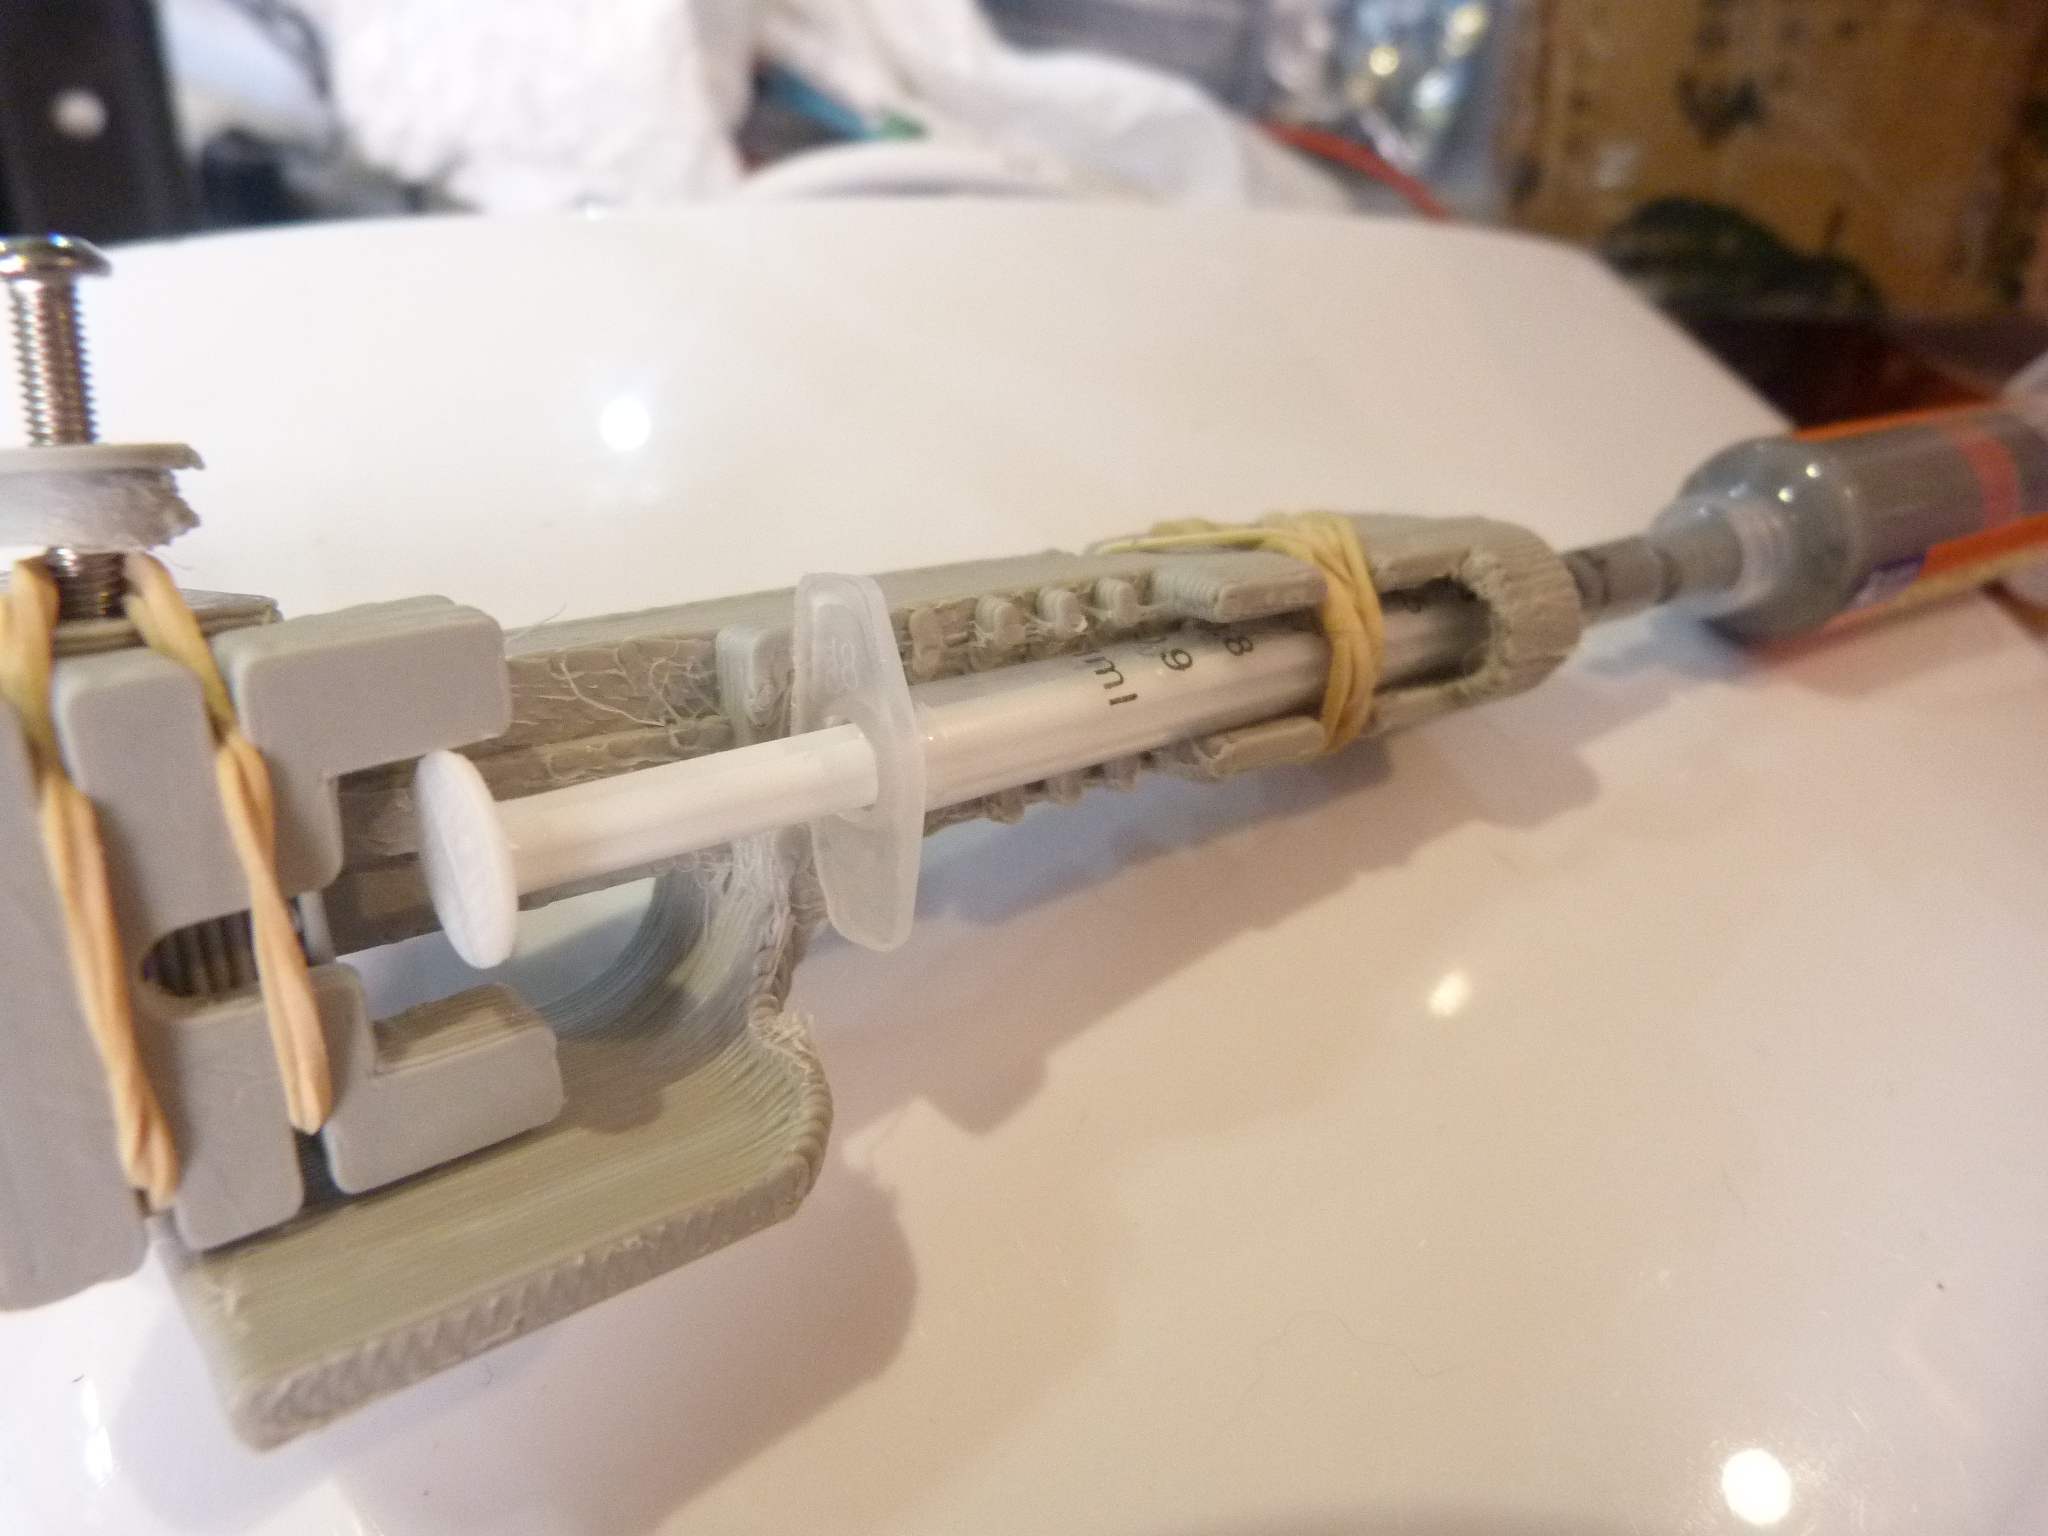
Take your empty (no mess!) 1ml syringe and clip the tension puller piece over the end of the plunger, I sized the gap in the piece to allow for some briding droop, but if your fit is a little loose you could add some glue or heat the backside of the puller and just give it a little tweak, it should be a good tight fit on the plunger head.
Take a rubber band and fit it across the backside of the puller and through the caps in the puller ends as pictured.
Insert the syringe and push it down into the last slot nearest the lever. Now a bit tricky, grab the elastic band ends and stretch them over the anchor washers that are on the axel, the flanges on the washer will keep the elastic in place (if you remembered to put the flanges outwards). The finger-guard side elastic should be abe to slip through past the guard if you just give it a little wiggle.
The "slots" that hold the syringe "ears" are slightly oversize so there is about half a mm forwards-backwards movement of the syringe, push the syringe forwards so the backside of the ears rests against the stop. Now take another elastic band and wrap it a couple times tightly over the syringe through the two slots on the underside, this will hold the syringe in place tightly.
Now you are nearly ready, fold the lever back out of the way and the plunger should be pulled back by the elastic band puller, now fold the lever down and the plunger is pushed. Adjust the screw so that the plunger is fully pushed when the screw is not quite fully horizontal (making it fully horizontal may lead to a "notch" when it kicks over the edge of the screw).
Exercise the lever some so that the screw smooths out a path for itself. If it feels "notchy", then you can sand the groove in the tension puller, or file the end of the screw to round it over a little and remove the grabbyness of the edge, this works well for me (I used a dremel carbide burr to do it, but whatever you have).
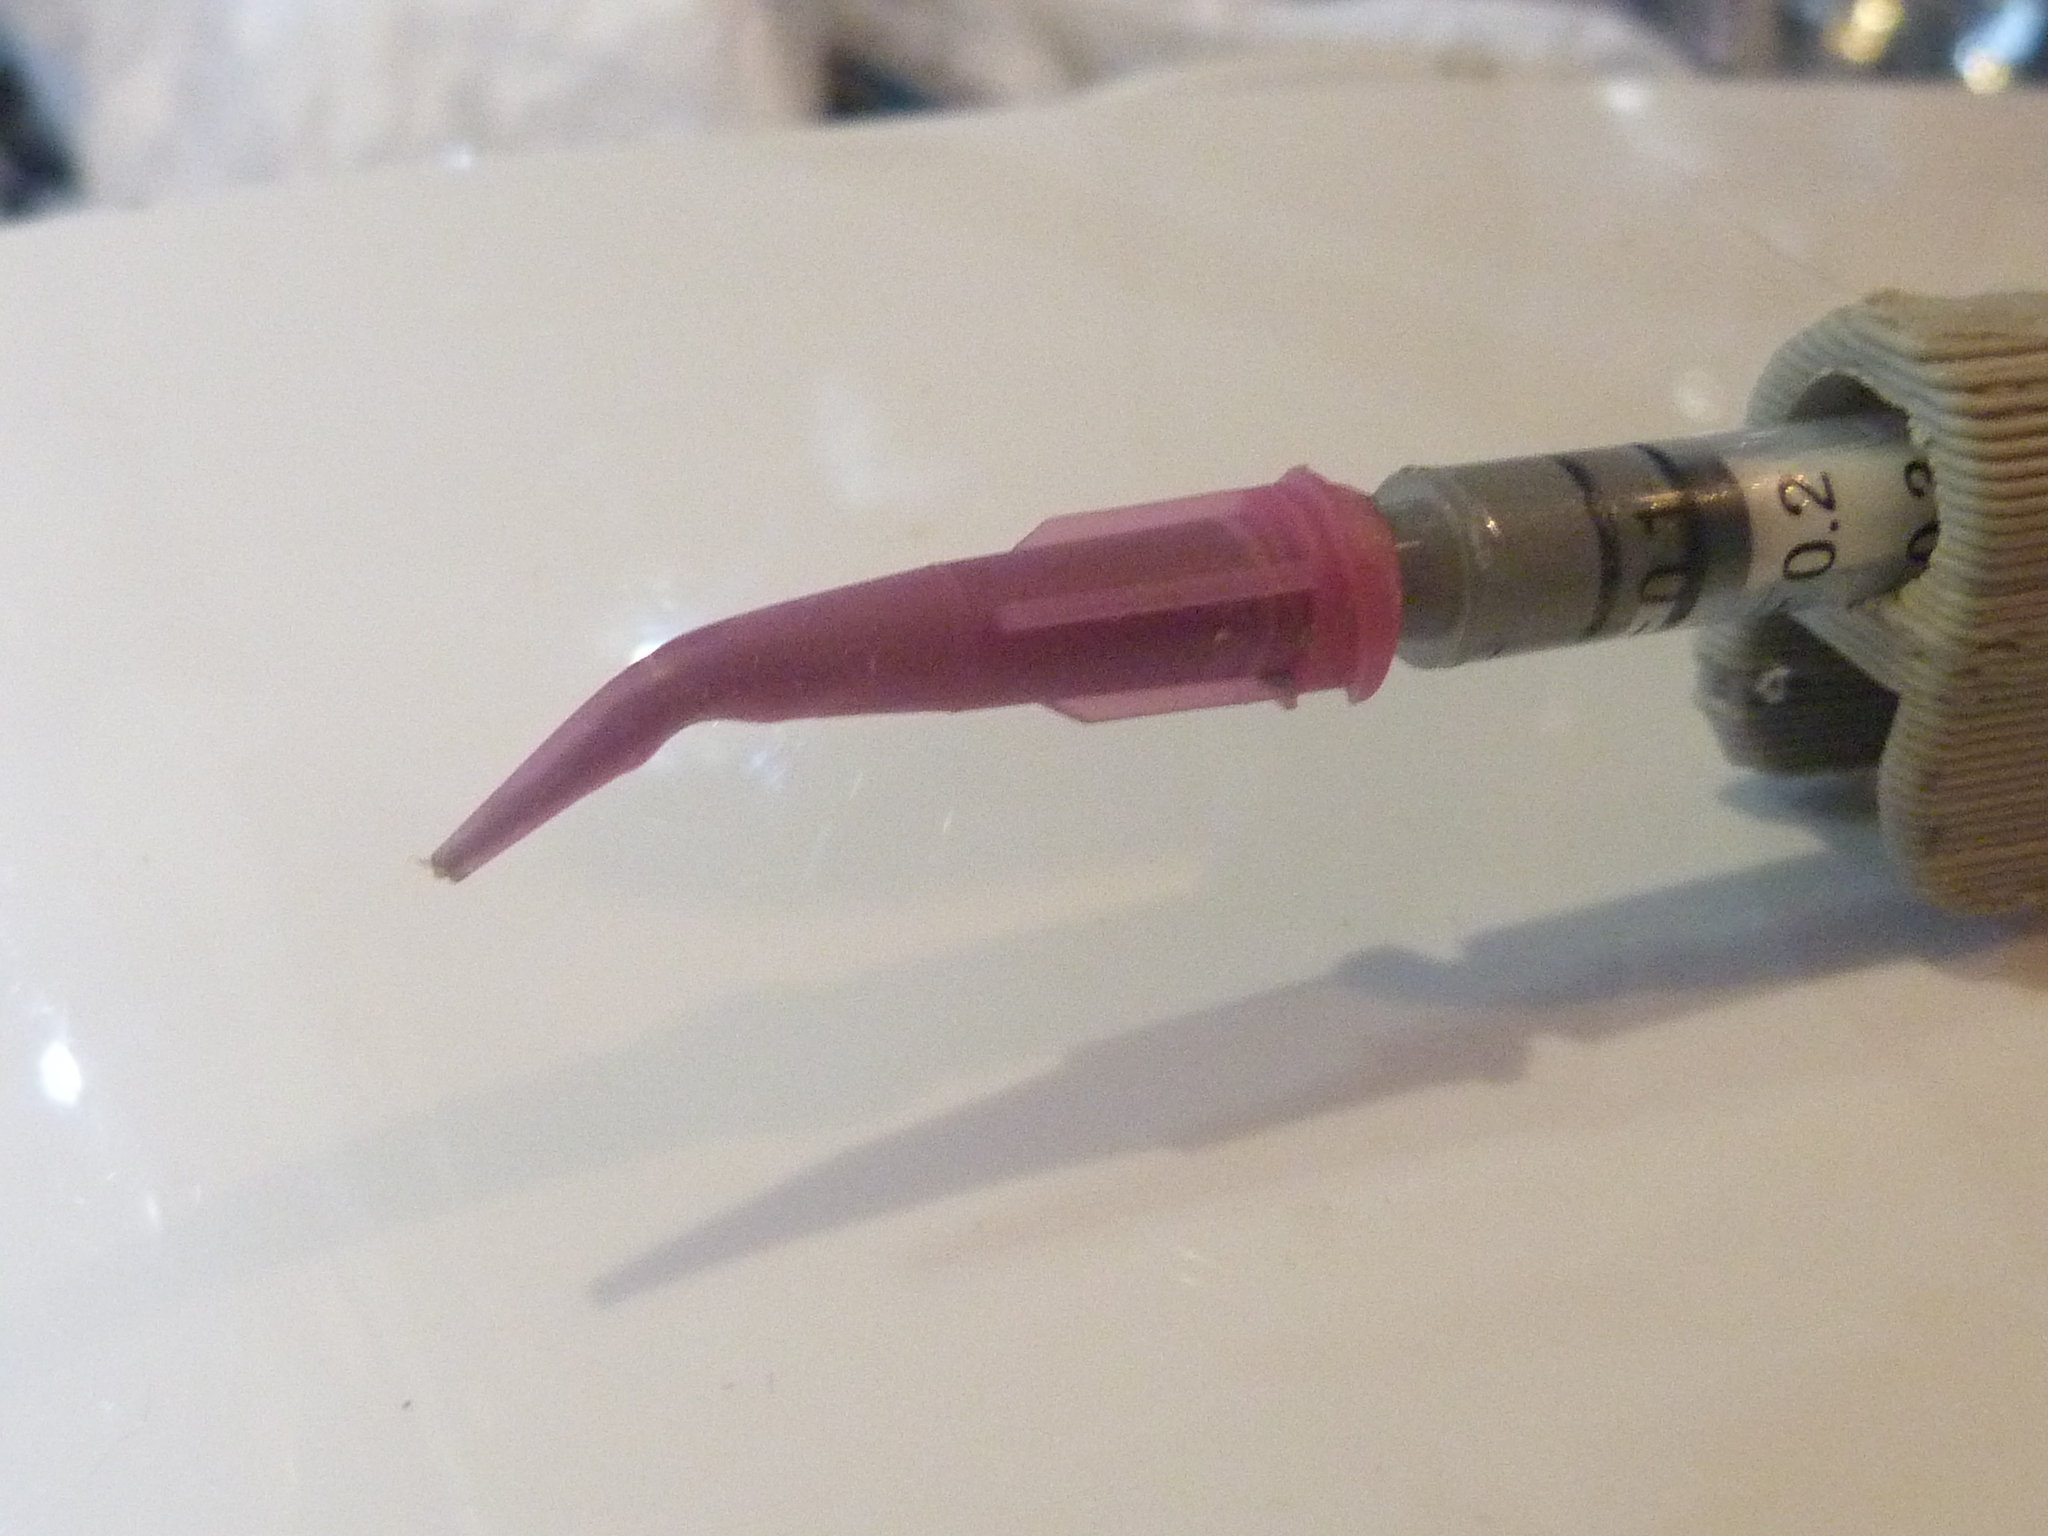
Nozzle Tip Preparation
A "bent" tip is best, and in my experiments I find that the "pink' 20G/0.6mm ones are a good size, rather than buying specially bent tips just point your hot air gun (or a lighter) at it and it will shortly droop into a perfect shape.
Filling
I have found that it's easiest to temporarily remove the clip from the 1ml syringe plunger, use a 1cm length of 3mm ID silicone tube (or a proper transfer coupling) to connect the 1ml syringe to your main syringe of solderpaste (usually a 10ml syringe), and back-fill it, remember to fill enough to pre-load the nozzle you will be using as well.
Once backfilled remove the 10ml syringe and if there is any air in the 1ml syringe then draw back the plunger further and carefully push it back a few times to work the air bubble out for best results (otherwise the air will be springy).
Now you can put the clip back on the end of the plunger, put your nozzle on the syringe, and depress the lever to pre-load the nozzle until paste starts extruding. Now you are ready to go, just relax the pressure on the lever to stop flowing, and apply pressure to start.
Tested Pastes & Syringes
I have tested some pastes and syringes...
-
WNB 20g BGA Tin Soldr Paste Leaded Sn63/Pb37, it dispenses very nicely and reflows well to a nice shine and very minimal flux. A 0.6mm tip was used
-
RELIFE 35g BGA Tin Solder Paste, I didn't like this one as much, doesn't dispense quite as well and has a more dull finish and a bit more flux residue.
For syringes, a low dead space 1ml syringe worked best
Licence
James has not specified any specific Licence for the files below, this means they have indicated that this project can be freely shared, accessed, used, reproduced, remixed, copied... without limitations